Foolproof Thanksgiving Turkey: Juicy & Flavorful Without the Stress
The Thanksgiving turkey stands as the undeniable centerpiece of the holiday table, a majestic symbol of gratitude and gathering. Yet, for many, the thought of roasting the perfect bird can conjure images of culinary chaos: dry meat, burnt skin, and endless hours spent basting. We understand that intimidation. The pressure to deliver a succulent, golden-brown turkey for a table full of eager guests can feel immense. But what if we told you that achieving a truly juicy, flavorful Thanksgiving turkey doesn't have to be a source of stress? It's not just possible; it's easier than you think.
Forget the days of kitchen panic. This article will guide you through a truly foolproof thanksgiving turkey recipe designed to ensure your bird is tender on the inside, crispy on the outside, and bursting with flavor – all without the constant fuss of traditional methods. Whether you're a first-time turkey roaster or a seasoned host looking for a simpler approach, prepare to impress your family and friends with a magnificent turkey that's both delicious and delightfully stress-free.
Unlocking the Secret to a Stress-Free Thanksgiving Turkey
The journey to a perfect Thanksgiving turkey often begins with a myriad of questions: What size bird do I need? How long will it take to thaw? What temperature should I roast it at, and for how long? Add in special techniques like brining, glazing, or spatchcocking, and it's enough to make anyone's head spin. But before you consider throwing in the proverbial kitchen towel, let's simplify things.
Think of cooking a turkey as cooking a very large chicken. The fundamental principles are much the same, just on a grander scale. You don't need expensive gadgets or elaborate setups to achieve an ultra-flavorful and juicy bird. Our approach focuses on straightforward steps that guarantee incredible results, minimizing common pitfalls like overcooking or serving a dry turkey.
Choosing Your Perfect Bird
Before any cooking begins, selecting the right turkey is crucial.
*
Size Matters: A good rule of thumb is 1 to 1.5 pounds of turkey per person. If you want leftovers (and who doesn't?), aim for 2 pounds per person.
*
Fresh vs. Frozen: Fresh turkeys offer convenience as they don't require thawing, but they need to be purchased closer to the holiday. Frozen turkeys are widely available and often more economical, but demand significant thawing time.
*
Thawing Safely: If buying frozen, the refrigerator is your safest bet. Allow approximately 24 hours of thawing time for every 4-5 pounds of turkey. So, a 16-pound bird would need about 3-4 days in the fridge. Do NOT thaw at room temperature.
The Foolproof Thanksgiving Turkey Recipe: Our Simple Secret
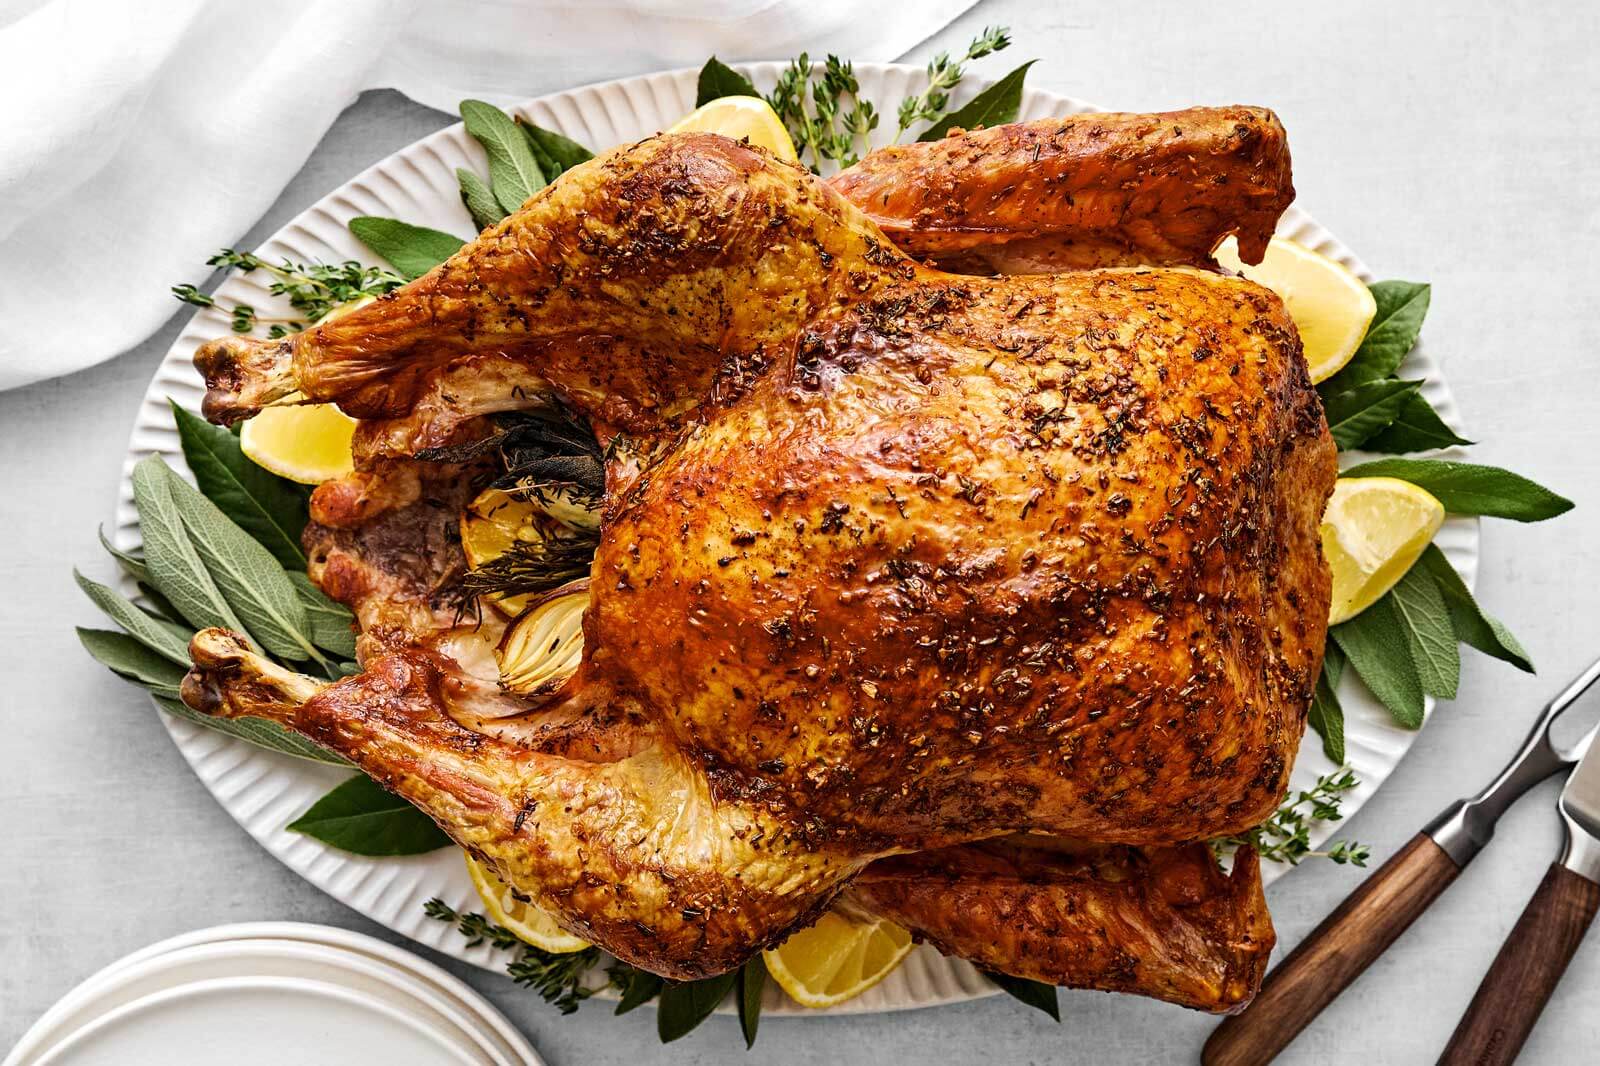
Our truly foolproof method aims to deliver maximum flavor and moisture with minimal intervention. This approach blends the best elements of a classic roast with ingenious techniques to eliminate the need for constant basting. We're going for deep flavor and a perfectly browned, crispy skin every single time.
The secret lies in two key components: a deeply flavorful herb butter compound applied both under and over the skin, and a strategic roasting method that leverages natural moisture.
Step-by-Step for Success
Follow these steps for a genuinely stress-free and delicious thanksgiving turkey recipe:
1.
Thaw and Prep (The Day Before or Morning Of):
* Ensure your turkey is completely thawed if frozen.
* Remove the giblets and neck from the turkey's cavity. You can save these for gravy or discard them.
* Pat the turkey *very dry* inside and out with paper towels. This is a critical step for crispy skin.
* Let the turkey sit at room temperature for about an hour before roasting. This helps it cook more evenly.
2.
Craft Your Herb Butter Compound:
* In a small bowl, combine 1 stick (8 tablespoons) softened unsalted butter with 2 tablespoons of finely chopped fresh herbs (rosemary, sage, and thyme are ideal), 2 cloves minced garlic, 1 teaspoon salt, and 1/2 teaspoon black pepper. For an extra layer of moisture and browning without basting, consider adding a tablespoon of mayonnaise or olive oil to this mixture.
3.
Flavor Infusion:
* Gently separate the skin from the breast meat using your fingers, being careful not to tear it.
* Rub about half of the herb butter mixture directly onto the breast meat under the skin.
* Spread the remaining herb butter evenly over the entire exterior of the turkey, including the legs and wings.
* Season the cavity liberally with salt and pepper.
* Stuff the cavity with aromatics like halved onions, garlic cloves, lemon wedges, and extra sprigs of herbs. This will infuse flavor from the inside out.
4.
Truss (Optional but Recommended):
* Trussing helps the turkey cook more evenly and maintain a neat shape. Simply tie the legs together with kitchen twine and tuck the wing tips under the body.
5.
Roast to Perfection:
* Preheat your oven to 425°F (220°C).
* Place the turkey, breast-side up, on a V-rack set inside a sturdy roasting pan.
* Roast for 30-45 minutes at 425°F until the skin is beautifully golden brown.
* Reduce the oven temperature to 325°F (160°C) without opening the door. Continue roasting, allowing about 13-15 minutes per pound for an unstuffed turkey, or 15-18 minutes per pound for a stuffed turkey.
* If the skin starts to get too dark, loosely tent the turkey with aluminum foil. This method requires no basting, as the butter and any added fat will render and keep the skin moist and flavorful.
6.
Temperature Check: The Golden Rule:
* The only way to truly know if your turkey is done is with an instant-read meat thermometer. Insert it into the thickest part of the thigh (without touching bone) and the thickest part of the breast.
* The turkey is done when the thigh registers 170-175°F (77-79°C) and the breast registers 160-165°F (71-74°C). Remember, the temperature will rise during resting.
7.
The Critical Rest:
* Once cooked, carefully remove the turkey from the oven. Tent it loosely with foil and let it rest for at least 20-30 minutes (or even up to an hour for larger birds) before carving. This resting period is *crucial*. It allows the juices to redistribute throughout the meat, ensuring a tender, moist, and juicy turkey. Don't skip this step!
Elevating Your Feast: Advanced Techniques & Expert Tips
While our foolproof method guarantees success, there are other techniques that can further enhance your turkey, each offering unique benefits for flavor, moisture, and cooking time. If you’re curious to explore beyond the basics, consider these:
*
Brining for Ultimate Moisture: Brining involves soaking your turkey in a salt and sugar solution overnight. This process helps the meat absorb moisture and seasoning, resulting in an incredibly juicy and flavorful bird. For a deep dive into brining techniques and recipes, check out our comprehensive guide:
Master Your Thanksgiving Turkey: Brining, Spatchcocking & Easy Recipes.
*
Spatchcocking for Speed & Crispness: Also known as butterflying, spatchcocking involves removing the turkey’s backbone so it can lay flat. This allows for faster, more even cooking and incredibly crispy skin. It’s a game-changer if you’re short on time or oven space. Discover more about this innovative method in the same article:
Master Your Thanksgiving Turkey: Brining, Spatchcocking & Easy Recipes.
*
Carving with Confidence: An expertly cooked turkey deserves an equally impressive carving. Learning the proper technique ensures every slice is perfect and your presentation is flawless. For step-by-step instructions and more expert advice on achieving that perfect golden bird, read our article:
Unlock the Juiciest Thanksgiving Turkey: Expert Tips for a Golden Bird.
*
Don't Forget the Gravy: The delicious drippings collected in your roasting pan are pure gold. Use them to make a rich, flavorful gravy that complements your turkey perfectly.
Common Turkey Troubles & How to Conquer Them
Even with a foolproof plan, sometimes things don't go exactly as expected. Here are quick fixes for common issues:
*
Dry Turkey: The number one culprit is usually overcooking. Always rely on a meat thermometer, not just cooking time. And remember that crucial resting period!
*
Uneven Browning: If one side is browning faster, rotate the pan. If the breast is browning too quickly, tent it with foil.
*
Turkey Not Done in Time: This typically happens from miscalculating thawing or cooking time. Ensure your turkey is fully thawed and use your thermometer diligently. If it’s getting close to serving time and it’s still under, you can carve it into pieces and finish cooking the thicker parts.
A Celebration, Not a Chore
Cooking a Thanksgiving turkey, while seemingly monumental, can truly be one of the most rewarding parts of the holiday. By adopting this foolproof thanksgiving turkey recipe, you'll discover that a juicy, flavorful, and beautifully browned bird is not only achievable but also surprisingly simple. With minimal fuss, a few key ingredients, and a reliable meat thermometer, you can transform a potentially stressful task into a triumphant culinary success.
This year, banish the stress and embrace the joy of the season. Your guests will rave, and you'll bask in the glory of having mastered the centerpiece of your Thanksgiving feast with effortless elegance. Happy Thanksgiving, and happy cooking!